Prepare the Aircraft Exterior
Preparing the aircraft exterior for cleaning involves a few steps. First, you have to gather all the necessary supplies such as soap, water and sponges. Then, (you) inspect the surface of the aircraft to find any cracks or dings that need repair before proceeding with cleaning. After repairing any defects, it's time to start washing! Start from the top and work your way down in sections, removing dirt and debris with a soft cloth. Be sure not to use harsh materials or chemicals - they can damage the surface of the plane! Once done, rinse off all soap residue thoroughly with clean water.
Now it's time to dry off! Use a microfiber towel to buff away excess moisture and get rid of streaks. (And) be sure not to leave any wet patches on the plane - that could result in rusting over time! Furthermore, you should pay special attention when wiping out hard-to-reach areas like windowsills and undercarriage compartments.
Finally, take a look at your work: if there are still any smudges left behind, use a clean polishing cloth and some polish for those extra tough spots. And don't forget to check every nook and cranny one last time before giving yourself an attaboy for completing this job successfully!
All in all, preparing an aircraft exterior for cleaning requires diligence and precision as even small mistakes could lead to major damage if left unchecked. Still though, with proper preparation beforehand anyone can achieve great results!
Gather all Cleaning Supplies
Gathering all the cleaning supplies needed to clean an aircraft exterior is essential for a successful job. (First,) You'll need scrub brushes, sponges, rags and buckets of warm soapy water. Don't forget to bring along some polishing cloths! You'll also require a few ladders or stepladders to reach those hard-to-get spots. And don't forget your safety gear: goggles, gloves and respirators.
Moreover, you may want to have some specialized cleaning solutions on hand as well – depending on how much dirt there is and how difficult it is to remove. Additionally, if you're dealing with stubborn stains or tough grease buildup, a pressure washer can be extremely helpful. But keep in mind that these are usually loud and powerful machines, so make sure you take necessary precautions while using them!
Furthermore, it's important not to overlook any details when gathering the materials for this task; otherwise you could end up wasting time (and money!) in the long run. For instance, having dustpans handy will help ensure you keep the area clean while working - this is especially true if you're working outdoors! To sum up; gather all your supplies beforehand so that everything goes smoothly when cleaning an aircraft exterior. After all - preparation is key!
Begin Washing with Soap and Water
Washin' an aircraft exterior is not complicated, but it does require some steps to ensure a thorough clean. First (and most important!), begin washin' with soap and water. Make sure you use a scrub brush or mop to get into all the nooks and crannys of the plane. Secondly, use a high-pressure hose to rinse off any excess dirt or debris. Finally, wax and polish the whole surface until its sparklin'. But don't forget! Always wear protective gear when dealin' with harsh chemicals!
Moreover, for really tough stains, opt for a stronger solvent like acetone or denatured alcohol. Apply these solutions in small amounts directly onto the stain with a cloth or sponge - be careful not to spread them over too much area! Let it sit for at least two minutes before wipin' away with a wet rag. Again, remember to use protective gear when handlin' such substances!
On top of that, if your aircraft's paint has been damaged or faded due to weather conditions like sun exposure or rain, there are special coatings available on the market which can be applied as an additional layer of protection. With this extra step your plane will stay lookin' beautiful for years to come!
All in all, follow these few simple steps and your airplane will be shinier than ever!
Rinse the Aircraft Exterior Thoroughly
Cleaning an aircraft exterior is no small task! First, it's important to (neglect) remove any dirt or debris from the surface. This can be done by using a pressure washer and a soft brush. Then, you'll need to rinse the aircraft exterior thoroughly. Make sure you take your time and pay close attention to all areas of the plane - especially those hard-to-reach spots! Once you're done rinsing, it's time to apply some propecia detergent. This will help break down any stubborn grease or oil that may be present on the surface. Finally, use a high-pressure hose to completely wash away all excess soap and grime. And voila - you've got yourself a clean aircraft! Transition: Now that we know how to clean an aircraft exterior, let's discuss some other important tips for maintaining it in top condition.
Dry the Surface with a Soft Cloth
Cleaning an aircraft exterior is a tricky task! It requires several steps to ensure a proper job. First, you must (remove) eliminate any debris or dirt from the surface of the plane using a soft brush. Then, (you ought to) make sure to dry the area with a soft cloth. This will help prevent any water spots on the plane's finish and leave it looking nice and shiny!
Additionally, you should use a mild detergent mixed with warm water to clean the surface. Make sure to scrub it gently but thoroughly in order to remove any remaining grime or stains. Once done, rinse off the detergent with plain water and then dry off again with that same soft cloth. Finally, apply some wax for extra protection and shine!
However, be careful when cleaning around sensitive areas such as windows, antennas and other equipment. These need special attention since they could easily be damaged if not treated properly. So take your time when cleaning these areas and don't forget to dry them off afterwards too!
All in all, proper cleaning of an aircraft exterior can take time but is worth it in the end for better results - so just follow these simple steps: Remove dirt or debris; Dry area with soft cloth; Clean surface with mild detergent; Rinse away detergent; Apply wax for extra protection; Be cautious around sensitive areas & remember to also dry those off afterwards!
Apply Protective Wax to Preserve Finish
Cleaning an aircraft exterior requires a lot of care and attention. First, you should (start by) removing dirt and debris with a soft cloth or brush in order to get rid of any stubborn spots. Next, use a mild soap solution to further clean the surface and then rinse it off completely. After that, dry it off using a soft cloth or paper towel. Now it's time to apply protective wax! This will help preserve the finish and keep it looking great for longer periods of time! It's important not to rush this step; take your time ensuring that all areas are covered. Once you have applied the wax, be sure to let it sit for at least fifteen minutes before buffing out any excess residue with a soft cloth or sponge. Lastly!, don't forget to put on some gloves while doing these steps as they can protect your hands from any harsh chemicals or solvents used during the cleaning process.
Additionally, there are other ways of keeping an aircraft exterior looking its best. Applying sealants, polishes, and compounds can also enhance its shine and durability over time - however, none of them provide the same level of protection as applying protective wax does!. Furthermore, when applying these items make sure you always follow instructions carefully as improper application may cause damage to the finish instead of helping it retain its beauty!
So there you have it - a few simple steps involved in cleaning an aircraft exterior that will help keep its finish looking beautiful for many years to come! With proper maintenance and care your plane will remain in top condition no matter how much use it gets! Now go ahead and get started today!
Inspect for any Remaining Dirt or Grime
Cleaning an aircraft exterior is a tedious task, that requires (attention to detail). First, you must start by inspecting the plane for any dirt or grime. It's important not to overlook even the smallest speck, as this can affect the performance of the aircraft! Once all visible dirt has been removed, be sure to double check and (ensure) there is no more left behind. Doing so will make it easier to(maintain) cleanliness in between flights.
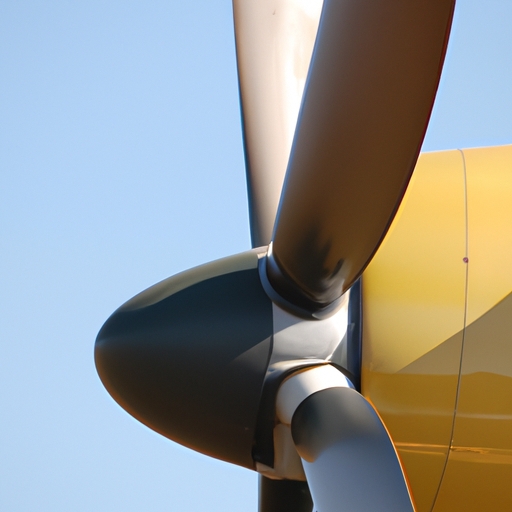
Next up, use a pressure washer with detergent formulated for airplanes. This should help break down any stubborn debris that may have been missed during inspection. You'll want to take care around sensitive areas like propellers or fuel tanks- they require extra caution when cleaning! Be sure to read up on manufacturer instructions before starting this step.
To wrap things up, inspect once again for any remaining dirt or grime. Pay special attention to tight spots and crevices where small particles could hide! Afterward, dry off the aircraft using a soft cloth and you're done- your plane should look as good as new now!
Final Check of the Finished Product
Cleaning an aircraft exterior is a difficult job! But it's worth the effort; afterall, a clean plane means happy passengers and a safe flight. First, you must (gather) gather all the materials needed for the cleaning process. This includes brushes, hoses, buckets and detergents. Next, start by removing any dirt or debris from the surface of the aircraft with a high-pressure hose before scrubbing it down with soapy water and a brush. After that, rinse off using warm water to remove any remaining soap residue. Then use an approved polish to give the plane its final check of the finished product.
However, there are some extra steps involved in this process too! You'll need to thoroughly inspect every corner of the aircraft for any signs of corrosion or damage before applying primer and paint as necessary. Finally, make sure to wax and buff away any imperfections on its exterior surfaces; this will ensure your plane looks great when it takes off!
To sum up, cleaning an aircraft exterior involves several steps such as gathering supplies, washing and rinsing with soap solution & warm water, polishing with approved polish & inspecting for damage/corrosion followed by priming & painting where necessary. Don't forget to wax & buff away blemishes! All these steps are important in order to have that lovely final check of the finished product(!).